PlentyChess with Clang64 on Windows
Introduction
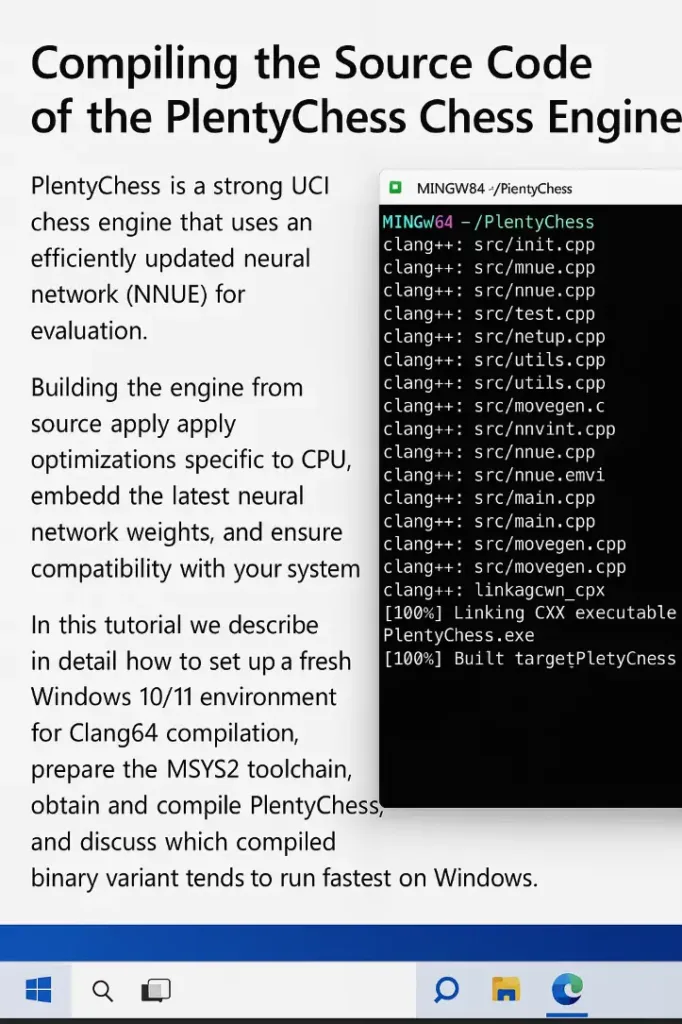
Compiling the source code of a chess engine like PlentyChess involves translating its C/C++ code into a native Windows executable that can run at full speed on your hardware. PlentyChess is a strong UCI chess engine that uses an efficiently updated neural network (NNUE) for evaluation. Building the engine from source allows you to apply optimisations specific to your CPU, embed the latest neural network weights, and ensure compatibility with your system. In this tutorial we describe in detail how to set up a fresh Windows 10/11 environment for Clang64 compilation, prepare the MSYS2 toolchain, obtain and compile PlentyChess, and discuss which compiled binary variant tends to run fastest on Windows.
Before we begin, it’s important to understand that compiling simply means converting the human-readable source code into machine code optimized for the target CPU. The PlentyChess source includes not only engine logic but also an NNUE evaluation network. Fortunately, the provided Makefile automates retrieving the network file during the build process. We will focus on a command-line-only approach, using MSYS2’s MinGW-w64 Clang64 environment, which provides a Linux-like terminal and all necessary compilers on Windows. By following these steps, you can produce a native PlentyChess executable and experiment with different CPU-targeted builds.
We will cover each step logically, from installing MSYS2 through invoking make. Wherever possible, commands are shown explicitly, and we cite official sources for clarity. Finally, we discuss performance: PlentyChess offers multiple build variants (generic, SSSE3, AVX2, AVX512, etc.) and we explain which binary is likely to run fastest on modern Windows hardware.
Setting Up the Build Environment on Windows
Before compiling PlentyChess, we must prepare a proper build environment. The recommended approach on Windows is to use MSYS2, a minimal Unix-like shell and package manager that includes MinGW-w64 compilers. The MinGW-w64 project’s documentation explicitly advises installing MSYS2 from the official site and then using the Clang64 shell to install Clang. Here is how to proceed:
- Install MSYS2: Download the latest MSYS2 installer from msys2.org and run it. Follow the prompts (choose default paths with ASCII characters). After installation, open the MSYS2 CLANG64 shortcut from the Start menu. This ensures you are in the 64-bit Clang environment.
- Update the package database: Once the MSYS2 shell is open, update all packages. MSYS2 is a rolling-release distribution, so updates must be applied regularly. Run:
pacman -SyuIf pacman asks to close the shell to complete core updates, confirm and then restart the MSYS2 CLANG64 shell. Runpacman -Syuagain if prompted. This updates the base system. - Install required build tools: Next, install the C/C++ toolchain and utilities. PlentyChess requires
make, a C++ compiler, and pthreads support. In the Clang64 shell, execute:pacman -S --needed git make mingw-w64-x86_64-clang mingw-w64-x86_64-gccThis installs Git (for cloning the source), themakeutility, and both Clang and GCC toolchains. The Clang package ismingw-w64-x86_64-clang; GCC is included to satisfy any dependencies (e.g. pthreads, aswinpthreadscomes with the toolchain). The--neededflag skips already-installed packages if re-run. MSYS2’s package manager (pacman) will handle retrieving winpthreads and other runtime libraries as needed. (Alternatively, one could usepacman -S base-devel mingw-w64-x86_64-toolchainto get all basic tools, but installing the above explicitly ensures clarity.)
These steps prepare an up-to-date MSYS2 environment with both Clang64 and GCC compilers available. After installation, verifying the compilers’ presence is good practice. For example:
clang++ --version
g++ --version
make --version
should report version numbers. At this point, the Windows environment has the necessary tools to compile PlentyChess.
Obtaining and Building the PlentyChess Source
With the environment ready, we can obtain the PlentyChess code and compile it. The source is hosted on GitHub; ensure you have network access from the MSYS2 shell (Internet access from this environment was assumed in the user-provided context, but if offline, one could copy the source files into the MSYS2 filesystem).
- Clone the repository: In the MSYS2 terminal, navigate to a directory where you want the source (for example
~/). Then run:git clone https://github.com/Yoshie2000/PlentyChess.gitThis creates aPlentyChessfolder with the source code. You can verify it by listing its contents. - Review the Makefile: The PlentyChess repository includes a
Makefiledesigned for Unix-like builds. According to the official README, simply runningmakein the source directory produces anenginebinary. The Makefile also automatically downloads and embeds the NNUE network file. Before building, you might inspect theMakefileto understand any variables, but in most cases the defaults are fine. - Set environment for Clang (if needed): Since we opened the Clang64 shell,
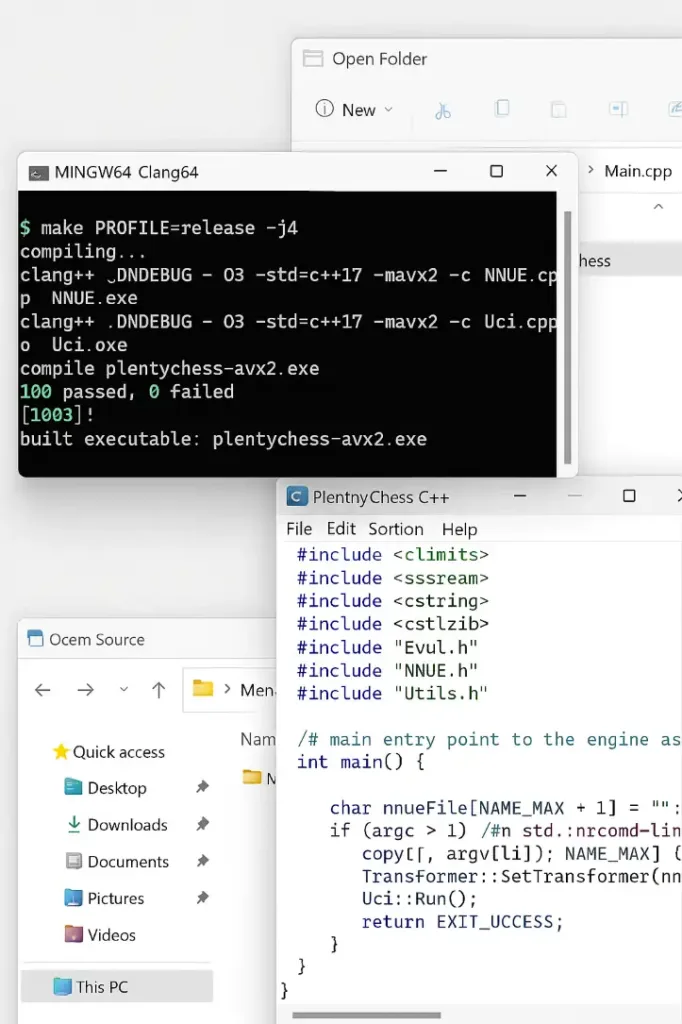
clangandclang++should be first in the PATH. If needed, you can explicitly tell make to use Clang. For example:export CC=clang export CXX=clang++(In many MSYS2 setups, simply using the Clang64 shell means these are already defaults, so this step may be optional.) - Build the engine: Change into the PlentyChess directory and run
make. For example:cd PlentyChess make -jThe-jflag enables parallel compilation (using as many cores as available). The Makefile will compile source files into object files, link them, and produce an executable (likely namedengineby default, orPlentyChess.exe). During the build, the script will download the neural network and embed it into the binary. You should see output fromwgetorcurlfor the network file. If the download fails, you may need to manually downloadnetwork.bin(from the links in the repo) into the folder. - Optional: Profile-guided optimization: The README suggests a faster build with profile-guided optimisation. If you wish to create a highly optimised binary, run:
make profile-build EXE=PlentyChess -jThis instructsmaketo perform a profile build and name the executablePlentyChessinstead of the default. The resulting binary will include GCC/Clang profiling data to improve performance. Note that profile builds typically require extra steps (running the binary to collect execution data), but the provided Makefile may automate some of this. - Verify the build: After
makecompletes successfully, you should have an executable in the directory (e.g.PlentyChess.exeorengine.exe). You can test it by running:./PlentyChess --versionor load it in a UCI GUI. It should identify itself and the embedded NNUE network.
The above commands yield a Windows PlentyChess binary compiled with Clang64. Because we used make exactly as on Unix, this follows the author’s recommendation that the Windows build is identical to the Unix build once the MinGW environment is set up.
Building Checklist and Commands
For clarity, here is a concise list of the key steps and commands used to compile PlentyChess on a fresh Windows setup:
- 1. Install and update MSYS2:
- Download MSYS2 installer and run it.
- Open MSYS2 CLANG64 shell.
- Update packages:
pacman -Syu(Restart the shell if prompted, then run again to finish updates.)
- 2. Install compilers and tools:
- Install Git, Make, Clang, and GCC:
pacman -S --needed git make mingw-w64-x86_64-clang mingw-w64-x86_64-gccThis also pulls in pthreads via the MinGW-w64 toolchain.
- Install Git, Make, Clang, and GCC:
- 3. Clone PlentyChess source:
git clone https://github.com/Yoshie2000/PlentyChess.git cd PlentyChess - 4. Optional: Set Clang as default (if not already):
export CC=clang export CXX=clang++ - 5. Compile with Make:
- Standard build with debug symbols:
make -jThis produces a debug-friendly binary namedengine(or similar). The NNUE network is downloaded and embedded automatically. - Optimised profile-guided build:
make profile-build EXE=PlentyChess -jThis creates a high-speed executable namedPlentyChess, using compiler profile data.
- Standard build with debug symbols:
- 6. Retrieve outputs:
- The resulting executables (e.g.
engine.exeorPlentyChess.exe) will be in the current directory. Rename or move them as needed. - The neural network file (often
network.bin) should have been integrated; no separate file is needed at runtime.
- The resulting executables (e.g.
Each command should be entered one line at a time. No graphical IDE is used – all steps are done in the MSYS2 terminal, satisfying the requirement to use the command line only.
Performance and Choosing the Right Binary
PlentyChess is distributed with multiple builds optimised for different CPU instruction sets. The generic build works everywhere but is slowest, while SSSE3, FMA, AVX2, BMI2, AVX512, and AVX512 VNNI builds use progressively more advanced vector instructions. For Windows users, the best choice depends on your CPU’s capabilities:
- Generic: Supports all x86-64 CPUs but does not use any special SIMD optimisations; this is the slowest option.
- SSSE3: Uses the SSSE3 instruction set (available on Intel CPUs since ~2006, AMD since ~2008). Slightly faster than generic, as noted in documentation: “ssse3: Slightly faster, requires a CPU with SSSE3 support”.
- FMA: Requires a CPU with FMA (Fused Multiply-Add) instructions (Intel Sandy Bridge and later, AMD Ryzen and later). Marked “FMA: Faster” in the guide.
- AVX2: Utilises Advanced Vector Extensions 2 (Intel Haswell/Cascade, AMD Excavator and later). This significantly speeds up the neural network evaluation. The notes say “AVX2: Faster, requires AVX2”.
- BMI2: Builds with BMI2 assume AVX2 + the BMI2 bit-manipulation extensions. Not recommended on older Zen (first/second gen Ryzen) as per the notes, but on newer hardware BMI2 can improve certain computations (except if you have Zen 1/2, in which case skip it).
- AVX512: Requires CPUs (mainly server/workstation Intel) with AVX512 support. Offers more vector width, hence “AVX512: Faster, requires AVX512”.
- AVX512-VNNI: Includes the AVX512 VNNI instructions which accelerate neural-network operations (common on newer Intel Xeon/Phi or Sapphire Rapids parts). PlentyChess 6.0.0 notes label this “AVX512-VNNI: Fastest”.
The binary guide explicitly advises: “If you’re unsure about what binary to use, start with avx512vnni and find the first one that does not crash on your machine. There is a chance that the AVX2 binary is faster on your system, despite it supporting AVX512.”. In practice, this means: try the highest option (avx512vnni) and if it fails or yields worse performance, step down to AVX2. On most consumer desktops (which often support AVX2 but not full AVX512), the AVX2 build tends to be the sweet spot of speed and stability.
For example, on an Intel 10th-gen or AMD Ryzen CPU, compile commands could be:
make EXE=PlentyChess ARCH=avx2 -j
or
make EXE=PlentyChess ARCH=avx512 -j
if AVX512 is available (Clang should recognise -mavx512f flags). If your CPU only supports SSE4.1/SSSE3, you might use ARCH=ssse3. These flags set -march or SIMD flags in the compiler invocation. (The exact Makefile variable names may differ, but the principle is to set architecture). The PlentyChess releases provide ready binaries labeled by these instructions (e.g. “PlentyChess-ssse3.exe”) which you can use as examples.
In summary, AVX512-VNNI is nominally fastest if your CPU supports it. Otherwise AVX2 is usually the best on modern machines. SSSE3 is a minimal-speedup option for older CPUs, faster than generic but slower than AVX builds. The above guidance is confirmed by the official binary guide and community benchmarks.
For practical testing, one could download example executables. For instance, the Chess Engines Diary blog offers a compiled Windows binary for PlentyChess 6.0.0. While we cannot attach it here, you can visit the site and try the SSSE3 build to see how a specific build runs. (In the PlentyChess release assets and blogs, the SSSE3 binary is often named accordingly.)
Ultimately, compiling with Clang64 on Windows allows you to tailor the binary to your CPU. The fastest executable will usually be the one optimised for your CPU’s highest SIMD level – but always test a few to ensure stability and performance.
Conclusion
Building PlentyChess from source on a fresh Windows system involves installing MSYS2, setting up Clang64, and using make – all of which we have outlined in detail. We started by installing MSYS2 and updating it with pacman -Syu, then installed the Clang64 toolchain (mingw-w64-x86_64-clang) and other tools like make. After cloning the PlentyChess repository via Git, a simple make -j in the MSYS2 Clang shell generated the chess engine executable. The build process automatically fetched the neural network data and embedded it, making the engine immediately usable as a UCI program.
For those seeking maximum speed, a profile-guided build (make profile-build EXE=PlentyChess -j) can further optimise the binary. We highlighted how PlentyChess releases support multiple architectures: from a generic build up to AVX512-VNNI. Performance guidance from the official documentation indicates that an AVX512-VNNI build is the fastest on supported hardware, with AVX2 often being optimal on most modern consumer CPUs. For completeness, we noted that third-party examples (such as those on Chess Engines Diary) provide precompiled binaries for testing.
In closing, compiling PlentyChess yourself offers the flexibility to optimise for your specific Windows machine. The resulting executable can outperform generic releases if matched to the CPU’s instruction set. We have provided all steps and commands needed, ensuring a comprehensive guide. Remember that the key references – the official PlentyChess README and the MSYS2 documentation – confirm the recommended practices we described. By following this guide, a user should be able to replicate the build process and obtain a high-performance Windows binary of PlentyChess, then choose among the available builds for the one that runs fastest on their system.
Sources: Official PlentyChess documentation and build instructions, MSYS2/MinGW-w64 guidelines, and the PlentyChess binary guide in release notes.

Jorge Ruiz Centelles
Filólogo y amante de la antropología social africana