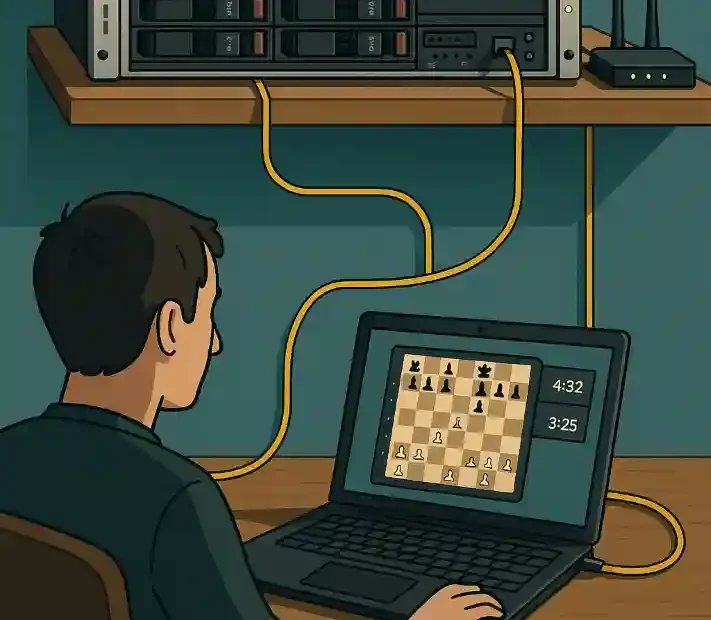
A local server is simply a computer on your home network that provides services (like hosting web pages or running applications) to other devices on that same network. In practice, it is not generally exposed directly to the internet; instead it serves clients in your home or local area network (LAN). For example, an HP ProLiant DL360p Gen8 rack server can act as a powerful local server at home. The ProLiant DL360p Gen8 is a 1U rack server with dual Intel Xeon processors and up to 768 GB RAM, making it more than capable of running multiple chess engines and web services simultaneously.
Using a server at home offers several advantages: it gives you full control over the hardware and software, avoids ongoing hosting fees, and keeps all data on your premises. When set up correctly, any device on your network can connect to this server – for example, to watch a chess tournament being run by the server. To connect reliably, it is best to use a wired Ethernet link rather than Wi‑Fi, since wired connections typically offer lower latency and greater stability. In short, a home LAN with a wired Ethernet link connecting the server and clients will give the smoothest experience for a live broadcast.
This article explains in detail how to turn your Windows‐based HP ProLiant server into a broadcast hub for a Fritz 20 chess engine tournament. We will start with basic definitions, then go step-by-step through hardware preparation, installing Windows, setting up Fritz 20 and chess engines, running the engine tournament, and finally publishing the games on a website. All steps are described so that even readers without prior server administration experience can follow along.
Setting Up the Server Hardware and Operating System
First, prepare the hardware and operating system on your server. Because a chess engine tournament may use significant CPU and RAM, start with a capable machine like an HP ProLiant DL360p Gen8 or similar server-class PC. Ensure it is connected by Ethernet to your router or switch. A wired connection is recommended: in most live chess broadcast setups, Ethernet is preferred over Wi-Fi for reliability.
- Install Windows Server or Windows 10/11. Power on the server and use the installation media to install a recent Windows version (e.g. Windows Server 2019 or Windows 10). Follow the normal install steps. When prompted for networking, configure the server’s network adapter with a static IP address. A static IP keeps the server reachable at a fixed address (e.g. 192.168.1.100). To set a static IP, make sure the subnet matches your router (for example 192.168.1.x), choose a free last octet (not the router’s address), set the gateway to your router’s IP (e.g. 192.168.1.1), and specify DNS servers (often the router’s IP and/or a public DNS like 8.8.8.8).
- Check network connectivity. After installation, open a command prompt and run
ipconfigto verify the static IP settings. From another PC on the LAN, tryping <server IP>to ensure the server is reachable. If not, re-check cabling and IP setup. Remember to disable or configure any on-board Wi-Fi or unused interfaces, so the server uses the wired network for all connections. - Enable Remote Desktop (optional). On Windows, you may enable Remote Desktop for easier administration from another PC. In System Properties, allow remote connections and add your user to the Remote Desktop Users group. This way you can log into the server from your laptop to manage it.
- Install Windows roles/features (IIS). To later host a web page, install the IIS web role. In Server Manager (or “Apps and Features” on Windows 10), go to Add Roles and Features, choose the Web Server (IIS) role, and install it. You do not need the ASP.NET features unless you plan on using them. After installation, open a web browser on the server and navigate to
http://localhost. You should see the default IIS welcome page, which confirms the web server is running.
An example of rack-mounted servers in a data centre. A ProLiant DL360p Gen8 is a 1U rack server, similar to those shown (image: Wikimedia Commons).

Installing and Configuring Fritz 20
Next, install Fritz 20, a chess application from ChessBase. This program provides the graphical interface and built-in engine, and also supports adding other engines. You will use Fritz 20 to run the engine vs. engine tournament.
- Acquire Fritz 20. Obtain the Fritz 20 installation package (for example, from ChessBase’s website or your purchase media). Copy the installer file to the server (via USB drive, network share, or download).
- Run the installer. Launch the Fritz 20 setup and follow the wizard. Choose the default installation folder (e.g.
C:\Program Files\ChessBase\Fritz 20). You may be asked for your product license key – enter it. After installation, you should be able to open Fritz 20. - Activate and update. The first time Fritz runs, it may ask for activation or a ChessBase login. Complete this step. Also allow it to update any engine databases if prompted. This may download the latest engine (for example, Fritz’s own engine) and openings.
- Configure multi-engine support. Fritz is designed as a multi-engine interface. To add other strong chess engines (like Stockfish), use Fritz’s engine management. In the Fritz menu, go to Engine → Create UCI Engine. This lets you browse to an engine’s executable (for example,
stockfish.exe) and add it to Fritz. UCI (Universal Chess Interface) is a standard protocol for chess engines. Fritz can integrate any UCI engine. Download free UCI engines (Stockfish, Komodo, etc.) and place their executables in a folder (e.g.C:\Engines). Then in Fritz, give each engine a name (e.g. “Stockfish 16”) and confirm. You can add multiple engines this way. Fritz’s interface will handle communicating with them (via a low-priority engine interface thread). - Check installed engines. After adding each engine, you will see it listed in Fritz under Engine → Manage Engines. Try clicking on one to verify Fritz can start it. You do not need to run a game yet; just ensure that the engine loads without error.
At this point, Fritz 20 has its own internal engine and any additional UCI engines you added. The next step is to set up a computer tournament among these engines. Fritz’s “Tournament” feature will pit engines against each other automatically and log the games.
Organising and Running the Chess Engine Tournament
Now we will use Fritz 20’s tournament feature to run games between engines. Follow these steps to create a tournament in Fritz:
- Start Fritz Tournament setup. In Fritz 20’s menu bar, go to Home → Tournaments → New Tournament (or sometimes Tournament → New Tournament depending on the version). This opens the tournament dialog.
- Add players (engines). Click to add players (which are actually the engines you configured). Typically you might choose two or more engines. For each one, select the engine name (e.g. “Fritz 20”, “Stockfish 16”) from your list of available engines. You may also be able to add the Fritz computer engine as a separate player.
- Configure tournament details. Choose the format (e.g. round-robin where each engine plays others, or multiple games between each pair). Set the number of games (for example, 10 games between each pair) and time controls (e.g. 5 minutes per side, or longer for deep analysis). Set any required details like increment or pondering.
- Set output file. In Fritz’s tournament dialog, there is an option to specify an output database or PGN file. Choose a path on the server (for example,
C:\Tournaments\engines.pgn) where all games will be recorded in PGN (Portable Game Notation) format. This PGN file will contain all moves and results. If Fritz requires each game saved separately, ensure they are all stored in the same folder. The user manual or support for Fritz indicates that PGN is the standard export format. - Start the tournament. Click Start (or OK) to begin. The engines will play through all the games. Fritz will display the boards and moves if you watch it on-screen, or you can let it run headless. The moves of each game will be saved to the PGN file as the games finish. Note the PGN file’s location.
As the tournament runs, Fritz will append each finished game to the specified PGN file. Once the tournament completes, you will have a single PGN file containing all games (or a database of games) on the server. This PGN is crucial – it will be used to broadcast the games to viewers.
Important tips:
- While the tournament is running, avoid heavy other tasks on the server to ensure full engine performance.
- Save backups: copy the PGN file to a safe location periodically, or use Fritz’s “save tournament” feature to generate a separate report.
- If Fritz provides a “Game list” or “database”, you could also save the database after the tournament. The PGN is easier to parse for the web interface.
Once all games have been played and recorded, you have completed the core chess task. Fritz and the engines did their job. Now we turn to broadcasting those games on a local website.
Setting Up the Local Web Server
To let spectators watch the games in their browser, we will use the built-in IIS web server on the Windows machine. Since we already installed IIS (see above), proceed as follows:
- Create the website folder. By default, IIS serves files from
C:\inetpub\wwwroot. You can place your files directly here, or create a subfolder (for example,C:\inetpub\wwwroot\Tournament). In that folder, you will put your HTML, CSS, and JavaScript files for the broadcast page, as well as the PGN file output by Fritz. For example, copyengines.pgnto this folder or a subfolder. - Test IIS. Open a web browser on the server and go to
http://localhost. You should see “Welcome” or an IIS default page. Then openhttp://localhost/engines.pgnor your HTML page file (e.g.http://localhost/index.html) to check access. If you get a directory listing, that’s okay; it means the server is reachable. If not, check Windows Firewall to allow incoming HTTP (TCP port 80) or temporarily disable the firewall for testing. - Place the PGN file and webpage. In your website folder, place the PGN file generated by Fritz. Also create an HTML page (say
index.html) that will display the games. This page will use JavaScript libraries (chessboard.js or a PGN viewer) to load the PGN. Ensure the PGN file and HTML have the correct file paths. For initial testing, you can copy a sample PGN into the folder and write simple HTML to see if it downloads correctly. - Check access from another computer. On a different PC on the same network, open a browser and navigate to
http://<server-IP>(use the static IP you set, e.g.http://192.168.1.100). You should see the IIS welcome page or your content. If it fails, ping the server IP to confirm network connectivity. Again, check the firewall on the server to allow HTTP (port 80).
With IIS running and serving files, the server is ready to broadcast content. We haven’t yet created the actual web interface, but at this stage the infrastructure is in place.
Creating a Web Interface for Live Game Display
Now we build a web page that shows the tournament games in real time. The idea is to load the PGN file and render a chessboard for each game (or a selected game). There are JavaScript libraries designed for this purpose. For example, chessboard.js provides a visual board, and pgn-viewer (which uses chess.js and chessground) can load PGN files. We will outline a simple approach:
- Choose a board library. You could use [chessboard.js] or [PGN Viewer]. For instance, chessboard.js (by Chris Oakman) is a lightweight MIT-licensed board widget. The CCRL live broadcasts use chessboard.js for their boards. Alternatively, the pgn-viewer on GitHub is a ready-to-use PGN viewer that uses Chessground for graphics.
- Include scripts in HTML. In your
index.html, add<script>tags to include the necessary JS and CSS files (either locally or via CDN). For example:<script src="https://unpkg.com/chessboardjs@1.0.0/dist/chessboard-1.0.0.min.js"></script><link rel="stylesheet" href="https://unpkg.com/chessboardjs@1.0.0/dist/chessboard-1.0.0.min.css">- Similarly include chess.js for the game logic if needed.
- Load the PGN. Using JavaScript, fetch the PGN file from the server. One simple way is to do
fetch('engines.pgn').then(response => response.text()).then(data => {/* use data */});. This gets the PGN text. - Initialize the board. Once you have the PGN text, use your chosen library to display it. With chessboard.js, you might need to parse the PGN into moves (using chess.js), then animate or let the user step through moves. With pgn-viewer (see [41]), you can call
pgnViewerwith configuration to display the whole game. For example:<div id="board"></div> <script> var pgn = /* loaded PGN text */; var config = {position: 'start', pieceTheme: '/img/chesspieces/wikipedia/{piece}.png'}; var board = Chessboard('board', config); // Use chess.js to apply moves from PGN to board </script>(Exact code depends on the library; the key idea is to feed the PGN moves into the board.) - Auto-update for live effect. Since the tournament is running, you may want the page to refresh or update as new games finish. A simple method: use JavaScript’s
setTimeout()orsetInterval()to reload the PGN file every few seconds. When reloading, clear the board and reapply all moves. For example,setInterval(() => { fetch('engines.pgn').then(...).then(updateBoard); }, 5000);would refresh every 5 seconds. This way, viewers see each game update soon after it finishes.
A live chess tournament broadcast interface. For example, Clono tablets send moves to a server which can then broadcast games live. The above image (Clono Chess Cast) shows how games appear on a viewer’s screen (pieces and moves) in real time.
The block above includes Figure: and an embedded image of a chess broadcast UI. It illustrates how a multigame viewer might look. In our case, the webpage you create will similarly display the current state of the games.
Allowing Viewers to Connect via Browser
Finally, configure the network so other users can watch. On each client computer on the LAN:
- Use the server’s IP address. Instruct viewers to open a web browser and navigate to
http://<server-IP>. Use the static IP set earlier (e.g.192.168.1.100). This will load your broadcast page (index.html) which then loads the boards. - Ensure firewall or router allows traffic. If a Windows Firewall is running, make sure it allows inbound HTTP (port 80) on the server. In Server Manager’s firewall settings, add a rule for TCP port 80 (or disable the firewall for testing). If the server has multiple network adapters, ensure the correct one is set to the private network profile.
- Test connectivity. On a client PC, try
ping 192.168.1.100to ensure the server is reachable. Then open a browser and go tohttp://192.168.1.100. If the page does not load, try using the server’s name (if DNS is configured) or double-check the IP and port. - Mobile or remote access (advanced). If you later want to allow access from outside your home, you could forward port 80 on your router to the server’s IP. However, this is optional and outside the basic local setup. For now, keep it on the local network for simplicity.
By now, a user on any PC or tablet in your home should see a web page with the live chess boards and moves. They can follow the engine games in their browser just as they would on a commercial broadcast site.
Conclusion
Running a local chess engine tournament and broadcasting it on your own server is entirely feasible even for non-experts. The key steps are: setting up a reliable Windows server on your LAN, installing Fritz 20 and adding UCI engines, using Fritz’s tournament feature to play and save the games, and finally creating a simple web interface to display the moves.
We started by defining what a local server is—a computer on your own network serving content to other devices—and chose appropriate hardware (e.g. HP ProLiant DL360p Gen8). Next, we installed Windows, ensured a static IP configuration, and installed IIS. In Fritz 20, we added additional engines via the UCI interface and ran an engine tournament, saving all games in a PGN file. Then, we set up a web page using chessboard or PGN viewer libraries, loaded the PGN file, and arranged for periodic refresh so that moves appear live. Finally, we tested access by opening the browser at http://<server-IP>, allowing any LAN user to watch the games.
Each step was explained with plain language and examples. Any chess enthusiast can follow this guide to build their own broadcast system at home. With practice, you can tweak the design: use better web frameworks, add annotations, or even stream video of the games. But the fundamentals remain the same: a local Windows server does the heavy lifting, Fritz 20 runs the tournament, and a simple web page lets the world (or just your housemates) watch all the action.
Sources: We drew on official documentation and community knowledge for each component: definitions of local servers, specifications of HP ProLiant servers, advice on network setup, Fritz 20 engine integration, and examples of web-based chess broadcasting. These references were used to ensure accuracy and clarity at each step. The result is a complete, end-to-end solution for broadcasting a Fritz 20 chess engine tournament on a home Windows server.

Jorge Ruiz Centelles
Filólogo y amante de la antropología social africana