Introduction
In modern web development, a script is a set of instructions written in a high‑level programming language that automate repetitive tasks, manipulate data, or orchestrate interactions between different systems. Unlike compiled applications, scripts are often interpreted at runtime, making them ideal for rapid development, easy modification, and system administration tasks. Automation scripts save time, reduce human error, and ensure consistency when performing complex or repetitive operations, such as publishing blog posts, managing user accounts, or synchronising content across multiple platforms.
A typical automation script interacts with external services through APIs (Application Programming Interfaces). In the context of WordPress, the WordPress REST API exposes endpoints that allow developers to programmatically create, read, update, and delete content on a WordPress-powered website by sending and receiving JSON (JavaScript Object Notation) payloads over HTTP or HTTPS (developer.wordpress.org, developer.wordpress.org). When executed from a Windows environment, such scripts can be written in languages like PowerShell or Python, both of which offer native or easily installable modules for HTTP requests, JSON parsing, and credential management.
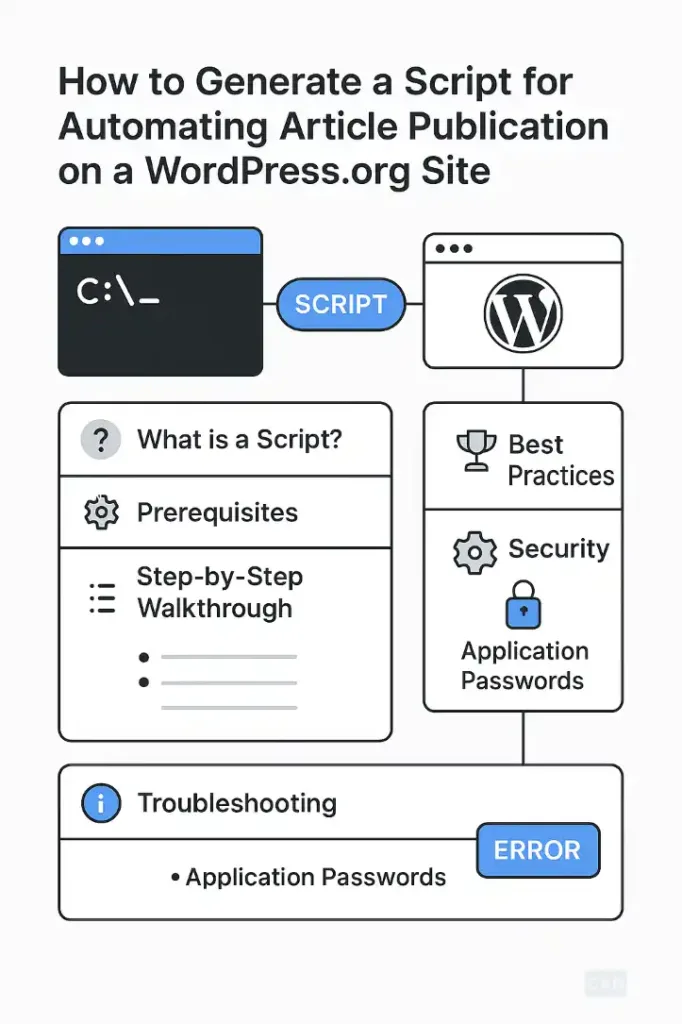
This article will guide you through the entire process of generating a script for Windows that automates the publication of articles on a WordPress.org site. We will explain what a script is, detail the software prerequisites, and provide a step‑by‑step walkthrough from script creation to execution. Along the way, we will highlight key best practices, security considerations—including the use of Application Passwords for authentication—and troubleshooting tips to resolve common errors. By the end of this guide, you will understand how to build a resilient, maintainable automation workflow that seamlessly publishes content to your WordPress.org website.
Importantly, this article is optimised for search engines by using clear headings, relevant keywords (e.g., “WordPress REST API”, “Windows automation script”, “publish posts automatically”), and structured content. Wherever factual statements or code examples are derived from external resources, we have cited authoritative sources to ensure accuracy and provide further reading. Let us now explore the software you will need to install before writing your first line of code.
Windows Script
To develop and execute our automation script on Windows, the following software components and tools are essential:
- Python (version 3.8 or higher)
- Python is a versatile scripting language with a rich ecosystem of libraries for HTTP requests, JSON handling, and environment management.
- Installation: Download the latest Python installer from the official website and ensure “Add Python to PATH” is selected during setup (robingeuens.com).
- pip (Python Package Installer)
pipis included by default with modern Python installations. It allows you to install and manage third‑party packages, such asrequestsfor HTTP operations andpython-dotenvfor environment variable management.
- Windows PowerShell (version 5.1 or PowerShell Core 7+)
- PowerShell can be used as an alternative to Python for scripting. It provides built‑in cmdlets like
Invoke-RestMethodfor REST API calls. - PowerShell Core is cross‑platform and recommended if you plan to run the script on non‑Windows environments in the future (blog.darrenjrobinson.com).
- PowerShell can be used as an alternative to Python for scripting. It provides built‑in cmdlets like
- A Code Editor or Integrated Development Environment (IDE)
- Examples include Visual Studio Code, PyCharm, or Notepad++.
- These tools offer syntax highlighting, debugging capabilities, and code completion, which enhance productivity and reduce errors.
- WordPress.org Website with Administrator Access
- You need an active WordPress.org installation where you can log in as an administrator to install plugins, generate authentication credentials, and configure REST API access.
- Application Passwords Plugin (Core Feature in WP 5.6+)
- WordPress 5.6 and later includes Application Passwords out of the box. This feature allows you to generate credentials for external applications (like our script) without using your primary login password (learn.wordpress.org).
- Git (Optional, but Recommended)
- For version control and collaboration, initialize a Git repository in your project folder. This practice ensures you can track changes, revert to previous versions, and collaborate with team members.
- Environment Variable Management
- To keep sensitive data out of source code, use one of the following approaches:
.envfile withpython-dotenvfor Python scripts.- Windows Environment Variables or PowerShell Secure Strings for PowerShell scripts.
- To keep sensitive data out of source code, use one of the following approaches:
Before proceeding, verify the installations:
- Python:
python --version pip --version - PowerShell:
$PSVersionTable.PSVersion - Git (if installed):
git --version
Ensuring the correct versions reduces compatibility issues when running the automation script. Once you have installed and verified these components, you are ready to move on to creating and configuring the script itself.
This section provides a detailed, step‑by‑step guide to building your automation script in Python. We will also outline corresponding PowerShell examples where relevant.
Begin by creating a dedicated folder for your script:
wordpress-auto-publish/
├── publish.py
├── .env
├── requirements.txt
└── README.md
publish.py: Main Python script..env: Environment variables file containing sensitive credentials.requirements.txt: Lists Python packages to install (requests,python-dotenv).README.md: Documentation for setup and usage.
Store the following variables in .env to avoid hard‑coding credentials:
WP_SITE_URL=https://your-site.com
WP_USERNAME=admin_username
WP_APP_PASSWORD=abcdef1234567890abcdef1234567890
Note: Generate an Application Password in your WordPress admin under Users → Your Profile → Application Passwords. Copy and store it securely (learn.wordpress.org).
Install the python-dotenv package:
pip install requests python-dotenv
Below is a complete example of a Python script that publishes a post using the WordPress REST API:
#!/usr/bin/env python3

import os
import requests
from dotenv import load_dotenv

# Load environment variables from .env
load_dotenv()

# Configuration
SITE_URL = os.getenv("WP_SITE_URL")
USERNAME = os.getenv("WP_USERNAME")
APP_PASSWORD = os.getenv("WP_APP_PASSWORD")
API_ENDPOINT = f"{SITE_URL}/wp-json/wp/v2/posts"

def publish_post(title, content, status="publish", categories=None, tags=None):
    """
    Create a new post on the WordPress site.

    Args:
        title (str): Post title.
        content (str): Post content (HTML).
        status (str): Post status (publish, draft).
        categories (list): Category IDs.
        tags (list): Tag IDs.

    Returns:
        dict: JSON response from WordPress.
    """
    payload = {
        "title": title,
        "content": content,
        "status": status
    }
    if categories:
        payload["categories"] = categories
    if tags:
        payload["tags"] = tags

    response = requests.post(
        API_ENDPOINT,
        auth=(USERNAME, APP_PASSWORD),
        json=payload
    )
    response.raise_for_status()
    return response.json()

if __name__ == "__main__":
    # Example usage
    new_post = publish_post(
        title="Automated Post Title",
        content="<p>This post was published automatically via Python script.</p>"
    )
    print(f"Post created: ID {new_post['id']} at {new_post['link']}")
Explanation of Key Steps:
- Environment Loading: We use
load_dotenv()to import variables from.env. - Authentication: Basic Auth with
USERNAMEandAPP_PASSWORD. - REST API Endpoint:
/wp-json/wp/v2/postsfor post creation (developer.wordpress.org). - HTTP Request:
requests.post()sends a JSON payload. - Error Handling:
response.raise_for_status()raises an exception for HTTP errors.
If you prefer PowerShell, create publish.ps1 with the following:
# Variables
$siteUrl = "https://your-site.com"
$username = "admin_username"
$appPassword = "abcdef1234567890abcdef1234567890"
$apiEndpoint = "$siteUrl/wp-json/wp/v2/posts"

# Post data
$body = @{
    title   = "Automated Post Title"
    content = "<p>Posted via PowerShell.</p>"
    status  = "publish"
} | ConvertTo-Json

# Invoke REST API
$response = Invoke-RestMethod -Uri $apiEndpoint `
    -Method Post `
    -Headers @{
        Authorization = ("Basic {0}" -f [Convert]::ToBase64String([Text.Encoding]::ASCII.GetBytes("$username:$appPassword")))
    } `
    -Body $body `
    -ContentType "application/json"

Write-Host "Post created: ID $($response.id) at $($response.link)"
This script uses Invoke-RestMethod for HTTP operations and Base64 encoding for Basic Authentication (blog.darrenjrobinson.com).
With the script created, let us now move on to executing and scheduling it.
Once your script is ready, follow these steps to execute it manually and schedule it for automated runs.
Python:
- Open a terminal or PowerShell window in the project directory.
- Activate a virtual environment (recommended):
python -m venv venv .\venv\Scripts\Activate pip install -r requirements.txt - Run the script:
python publish.py
PowerShell:
- Open PowerShell and navigate to the script folder.
- Ensure script execution is allowed:
Set-ExecutionPolicy -Scope Process -ExecutionPolicy Bypass - Run the script:
.\publish.ps1
Upon successful execution, you should see the newly created post’s ID and link printed in the console.
To automate the script on a schedule (e.g., daily at 08:00):
- Open Task Scheduler: Press Win + R, type
taskschd.msc, and press Enter. - Create a Basic Task:
- Name: “WordPress Auto Publish”.
- Trigger: Daily at your desired time.
- Action: Start a program.
- Configure the Action:
- Program/script (Python):
C:\Path\To\venv\Scripts\python.exe - Arguments:
C:\Path\To\wordpress-auto-publish\publish.py - Start in:
C:\Path\To\wordpress-auto-publish
- Program/script (Python):
- For PowerShell:
- Program/script:
powershell.exe - Arguments:
-NoProfile -ExecutionPolicy Bypass -File "C:\Path\To\wordpress-auto-publish\publish.ps1"
- Program/script:
- Finish the wizard and ensure the task is enabled.
Your script will now run automatically according to the specified schedule, continually publishing new content as defined by its logic.
Automating WordPress publishing introduces new considerations around error handling, security, and maintainability. Below are recommendations to ensure a robust implementation.
- HTTP Errors: In Python, wrap REST calls in
try/except requests.exceptions.RequestExceptionblocks to catch timeouts, connection errors, and non‑2xx responses. - Logging: Use the built‑in
loggingmodule (Python) orWrite-Verbose/Write-Error(PowerShell) to record successes, failures, and stack traces to a log file. - Retries: Incorporate exponential back‑off and retry logic for transient network failures.
- Least Privilege: Create a WordPress user with only the necessary capabilities (e.g.,
Authorrole) instead of using an administrator account. - Rotate Application Passwords: Periodically regenerate and update your script’s credentials.
- Protect
.envFiles: Exclude.envfrom version control (.gitignore) and set strict file system permissions.
- Bulk Publishing: Read post data from a CSV or database and loop through records.
- Media Uploads: Use the
/wp-json/wp/v2/mediaendpoint to upload images before associating them with posts (medium.com). - Custom Taxonomies: Include
categories,tags, or custom taxonomy IDs in the payload to organise content.
- Integrate with monitoring tools (e.g., email notifications, Slack alerts) when failures exceed a threshold.
- Use services like UptimeRobot or a custom heartbeat API endpoint in your script to confirm it runs as expected.
In this article, we have explored how to generate a Windows script—using either Python or PowerShell—that automatically publishes posts to a WordPress.org website via the REST API. We began by defining what a script is and why automation matters in modern web development. We then detailed the software prerequisites, including Python, PowerShell, developer tools, and WordPress Application Passwords for secure authentication. Following that, we walked through creating a well‑structured project, managing environment variables, writing the core script, and using authentic REST API endpoints. We also provided an alternative PowerShell example for those who prefer Microsoft’s native scripting environment.
Next, we covered how to execute the script manually and schedule it with Windows Task Scheduler for fully automated operation. We discussed best practices around error handling, secure credential storage, logging, and extensibility—emphasising the importance of least privilege and regular credential rotation for security. Finally, we highlighted ways to extend the script’s functionality, from bulk publishing and media uploads to integrating custom taxonomies and monitoring.
By following this comprehensive guide, you now have the knowledge and tools to implement a robust automation workflow that can save hours of manual content management and ensure your WordPress site stays fresh and up‑to‑date. Automation not only increases efficiency but also minimizes errors, allowing you to focus on creating high‑quality content rather than repetitive administrative tasks. Feel free to expand upon the examples provided here—incorporate advanced features like OAuth authentication, multisite support, or headless CMS integrations—to tailor the solution to your unique requirements.
Automation is a critical capability in today’s fast‑paced digital landscape. With the power of the WordPress REST API, modern scripting tools, and this guide, you have everything you need to build a scalable, maintainable, and secure content publishing pipeline. Happy scripting!

Jorge Ruiz Centelles
Filólogo y amante de la antropología social africana